
I’ve owned those cheap metal kits before—the ones that rattle loudly in the wind and turn into ovens in July. That is why I always come back to wood; nothing beats the solid feel and smell of a timber frame.
Looking for high-quality wood shed plans 10×12? Discover why wood is the best material for your backyard build. We cover lumber selection, siding options, and durability tips.

The Smell of Sawdust
There is something undeniably satisfying about a wooden shed. It’s the smell of fresh-cut pine, the solid “thud” when you close the door, and the ability to drive a nail anywhere you want to hang a tool.
While big-box stores are full of flimsy metal boxes and plastic snap-together kits, serious homeowners almost always come back to one search: wood shed plans 10×12.
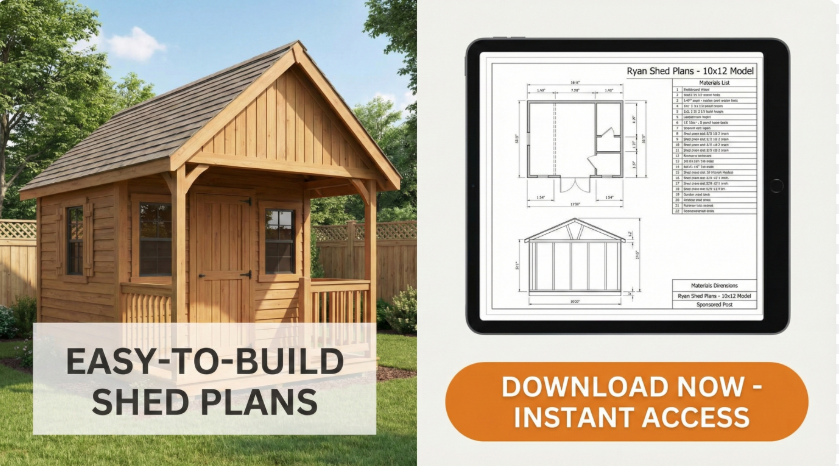
🚧 Planning Your Next Build?
Don't start without the Ultimate Guide: Barns, Sheds & Outbuildings. It’s the "DIY Bible" containing:
- 100+ Plans: Barns, sheds, garages, and playhouses.
- Step-by-Step: Covers foundations, framing, wiring, and roofing.
- Blueprints: Includes info on ordering CAD files.
Why? Because a 10×12 wooden shed isn’t just a temporary storage locker; it’s a permanent outbuilding. It adds real value to your property. It can be painted to match your house. It can be insulated, wired for electricity, and customized in ways that plastic sheds simply can’t match.
If you are ready to build a structure that will last for 20+ years, this guide covers everything you need to know about working with wood shed plans, selecting the right lumber, and keeping your investment rot-free.
1. Why Choose Wood? (The Metal vs. Wood Debate)

Before you download your blueprints, it’s worth validating your choice. Why is wood the superior material for a 10×12 footprint?
Customization is King
With a metal shed, you are limited to the factory walls. If you want to hang a heavy shelf or a bike rack, good luck—the thin metal walls will buckle.
With a wood shed, the studs (2x4s) allow you to mount heavy shelving, pegboards, and overhead lofts. You can modify the plans to add windows, move the door, or add a workbench wherever you please.
Aesthetics and HOA Approval
Let’s be honest: metal sheds look like industrial lockers. Plastic sheds look like toys. A wooden shed, finished with T1-11 siding or lap siding and painted to coordinate with your home, looks like a professional addition to the landscape. In fact, many Homeowner Associations (HOAs) require sheds to be constructed of wood and match the primary residence.
Temperature Control
Wood is a natural insulator. A metal shed turns into an oven in the summer and a freezer in the winter, leading to condensation that rusts your tools. A wood shed breathes better and maintains a more stable interior temperature.
2. Decoding the Lumber: What to Buy?
One of the most confusing parts of reading wood shed plans 10×12 is understanding the “Lumber List.” Not all wood is created equal. Using the wrong type of wood in the wrong place is why some DIY sheds rot in 5 years while others last 50.
Here is the “Wood Rule of Thumb” for your build:
The Foundation & Floor: Pressure-Treated (PT)
Anything that touches the ground (or is close to it) MUST be Pressure-Treated. This wood is infused with chemicals (copper azole) that resist rot and termites.
- The Skids: Use 4×4 or 6×6 Rated for “Ground Contact” (UC4B).
- The Floor Joists: Use 2×6 Pressure-Treated lumber.
- The Visual Check: PT wood usually has a green or brown tint and feels heavier/wetter than standard lumber.
The Skeleton (Walls & Roof): SPF (Spruce-Pine-Fir)
For the studs, plates, and rafters, you don’t need expensive treated wood because these parts will be kept dry inside the walls.
- Standard 2x4s: Look for “KD-HT” (Kiln Dried, Heat Treated) stamps. This means the wood has been dried to prevent warping.
- Pro Tip: When picking through the pile at the lumber yard, “crown” every board. Look down the length of the 2×4 to see if it curves. Use the straightest ones for door frames and corners.
The Skin (Siding): T1-11 vs. LP SmartSide
Most 10×12 wood shed plans call for 4×8 sheets of siding.
- T1-11 (Plywood): The classic “rustic” look. It’s actual wood. It requires good painting/staining to prevent rot.
- LP SmartSide (Engineered Wood): This is wood strands treated with waxes and resins. It looks like wood but is engineered to resist rot and bugs better than plywood. It is often the choice for “Premium” builds.
3. The 10×12 “Sweet Spot” for Wood Efficiency
Why do we push the 10×12 size so hard? It’s not just about floor space; it’s about Lumber Math.
In the US, lumber comes in standard lengths: 8ft, 10ft, 12ft, and 16ft.
Plywood comes in 4×8 sheets.
- 10×12 cuts waste to near zero.
- Your floor uses exactly (10) 12-foot boards.
- Your side walls use exactly (3) 4-foot wide sheets of siding ($12 \div 4 = 3$).
- Your front/back walls use overlapping sheets with minimal trimming.
If you were to build an 11×11 shed, you would be cutting 1 foot off every single 12-foot board and throwing it away. That’s hundreds of dollars in wasted wood. Wood shed plans 10×12 are designed to use every inch of the tree you paid for.
4. Preventing the “Rot Clock”

The biggest enemy of a wood shed is moisture. When you download our plans, pay special attention to these three details that extend the life of the wood:
A. The 6-Inch Rule
Your wood siding should never touch the grass. The plans will show the siding starting 6 inches below the floor frame, but ensure your gravel pad is high enough that the wood is clear of the soil. Wood wicks moisture like a sponge; if it touches wet grass, it will rot from the bottom up.
B. Roof Overhangs
Do not skimp on the rafters. A good set of plans will include a 6-to-12-inch overhang (eave) on the sides and gables. This acts like an umbrella, pushing rainwater away from your wooden walls. Sheds with no overhangs (flat “box” styles) usually see wall rot much faster.
C. Seal Your Cuts
If you cut a piece of T1-11 siding or a trim board, you expose the raw, untreated “meat” of the wood. Before you nail it up, dab a little primer or paint on that cut edge. It takes 5 seconds but adds years to the lifespan.
5. Cost Reality: Wood vs. The Market
Lumber prices fluctuate. In 2025, building a 10×12 wood shed is generally cheaper than buying a pre-fab one of the same quality, but it requires budgeting.
- Budget Build (Rough Sawn / Pine): You can build a 10×12 using standard T1-11 and economy studs for approx. $1,200 – $1,500.
- Premium Build (Cedar / Engineered): If you opt for Cedar trim (naturally rot-resistant) and architectural shingles, you are looking at $2,800+.
Want a detailed breakdown? Check out our guide on [Link: 10×12 Shed Cost Breakdown].
6. Step-by-Step Overview (The Woodworker’s Workflow)
While our [Link: How-To Construction Guide] covers the assembly in detail, here is the workflow specific to managing your lumber:
- Sort the Pile: When your lumber is delivered, separate it immediately. Put the heavy wet Pressure-Treated wood near the site. Stack your 2×4 studs on a flat surface and cover them. If you leave 2x4s baking in the sun for 3 days, they will twist like pretzels.
- Cut the “Kits”: Don’t cut one board at a time. Cut all your studs at once. Cut all your rafters at once. This is “batching,” and it saves hours.
- Frame and Skin: With wood sheds, you usually nail the siding onto the wall frame while it is lying flat on the floor. This creates a perfectly square wall that is heavy but easy to stand up.
- Finish Immediately: Once the shell is up, paint or stain it within 30 days. UV rays from the sun damage raw wood fibers surprisingly fast.
7. Conclusion: The Legacy of Building with Wood
There is a reason we still find wooden barns standing from 100 years ago. When built correctly, wood is incredibly resilient.
Choosing wood shed plans 10×12 gives you a structure that is repairable. If a piece of siding gets damaged in a storm 10 years from now, you simply pry it off and nail on a new one. Try doing that with a dented metal shed or a cracked plastic one.
Your backyard deserves more than a plastic box. It deserves a structure built with your hands, smelling of pine, and built to last.
Ready to start your build?
Get the professional blueprints that maximize lumber efficiency and minimize waste.