There is a unique pride that comes from sitting down at a table you built with your own hands. Instead of settling for generic, mass-produced patio sets that look exactly like your neighbor’s, crafting your own furniture lets you tailor every dimension, wood type, and finish to your exact taste. The deep satisfaction of turning raw lumber into a custom, functional masterpiece far outweighs the convenience of simply swiping a credit card at a big-box store.
Patio furniture is notoriously expensive, and most store-bought options lack personality. If you want a backyard centerpiece that starts conversations, building a modern A-frame dining table with a built-in herb garden is the perfect weekend project.
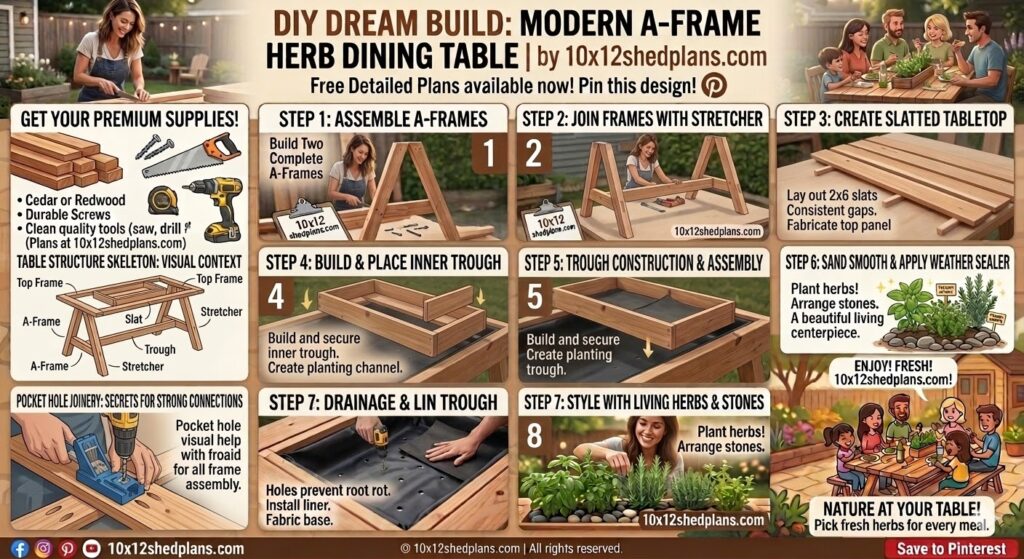
This design merges a rustic, heavy-duty build with functional gardening. Instead of cluttering your patio with separate planters, your basil, thyme, and succulents sit right in the center of the table.
This guide covers everything you need to build a weather-resistant, rock-solid outdoor table, complete with the proper drainage required to keep the wood from rotting. Whether it sits on a concrete patio or right next to a backyard 10×12 storage shed, this table is built to last.
🚧 Planning Your Next Build?
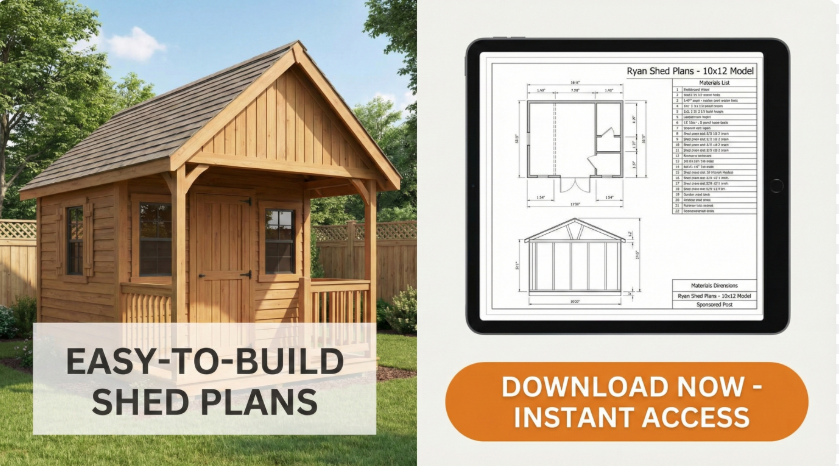
Don't start without the Ultimate Guide: Barns, Sheds & Outbuildings. It’s the "DIY Bible" containing:
- 100+ Plans: Barns, sheds, garages, and playhouses.
- Step-by-Step: Covers foundations, framing, wiring, and roofing.
- Blueprints: Includes info on ordering CAD files.
Why Choose an A-Frame Planter Design?
This isn’t just about aesthetics; the A-frame is incredibly practical for outdoor builds.
- Maximum Stability: Triangles offer the best structural integrity. The A-frame base prevents the frustrating wobble common in cheaper four-legged tables, easily supporting the heavy weight of soil, rocks, and a full dinner spread.
- Space-Saving: By dropping the planter directly into the table, you free up valuable deck space. It also keeps fresh culinary herbs exactly where you need them while eating.
- Visual Contrast: The thick, rigid lines of the lumber pair perfectly with the soft, organic look of live plants.
Materials and Tools Guide
Your choice of lumber determines how long this table survives the elements. Avoid untreated pine unless you plan to paint it heavily and keep it completely covered.
The Best Wood for Outdoor Tables:
- Cedar or Redwood: These naturally resist rot, moisture, and insects. They cost more upfront but will outlast almost anything else.
- Pressure-Treated Wood: A budget-friendly option for the base, but it needs time to completely dry out before you can sand or seal it.
Tools You Need:
- Miter saw (or a circular saw with a straight edge guide)
- Power drill and impact driver
- Pocket hole jig (essential for hidden, strong joints)
- Random orbital sander (80, 120, and 220 grit)
- Heavy-duty staple gun
Materials List:
- (6) 4×4 x 8′ Cedar posts (A-frame legs and trestle)
- (8) 2×6 x 8′ Cedar boards (Tabletop and matching benches)
- (2) 1×6 x 8′ Cedar boards (Planter box frame)
- 2 ½” and 4″ exterior-grade pocket hole screws
- Waterproof exterior wood glue
- Heavy-duty plastic pond liner or landscape fabric
- High-quality exterior spar urethane
Step-by-Step Construction Guide
1. Assemble the A-Frame Base
The foundation needs to be perfectly level. We use thick 4×4 posts for maximum weight capacity.
- Cut the Angles: Cut four 4×4 legs to 28 inches long. Cut both ends at a 15-degree parallel angle so they sit flat on the ground and flush against the top support.
- Cross Supports: Cut two 4x4s to 30 inches (top supports) and two to 40 inches (bottom trestle supports).
- Joinery: Drill heavy-duty pocket holes at the top and bottom of the angled legs. Secure them to the cross supports using waterproof wood glue and 4″ exterior screws.
- Connect the Frames: Cut a center 4×4 stretcher (typically 72 inches for an 8-foot table). Fasten it between the two lower cross supports to lock the two A-frames together.
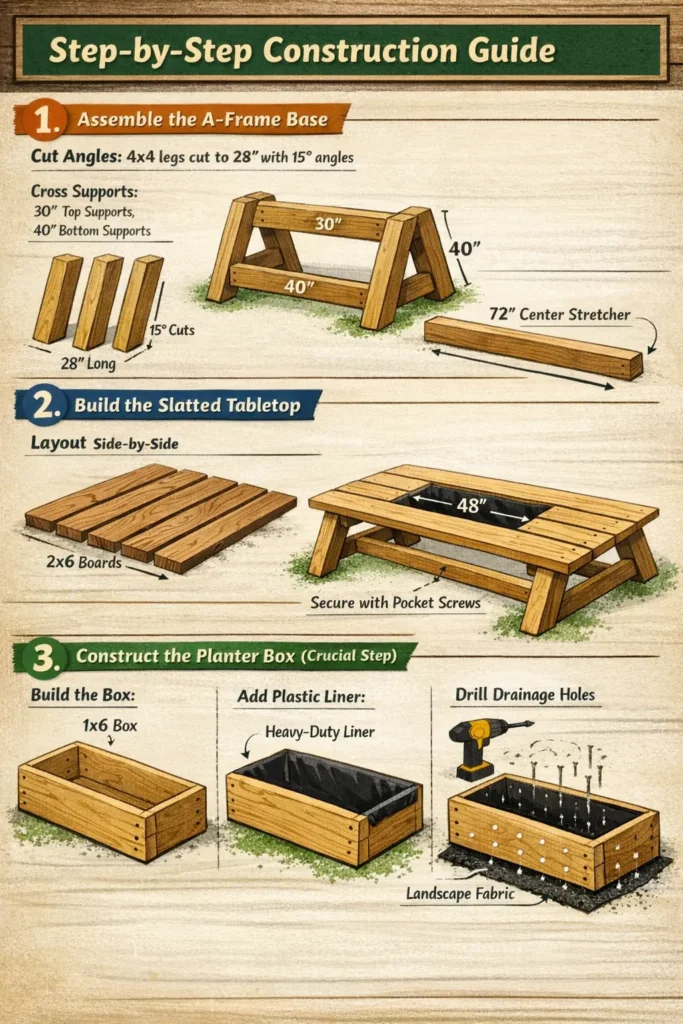
2. Build the Slatted Tabletop
Instead of a solid surface, we build a frame to leave room for the plants.
- Layout: Lay six 2×6 boards side-by-side.
- Create the Opening: Cut the middle two boards shorter to make room for the planter. For a standard build, leave a 4-foot gap dead center.
- Secure the Top: Use pocket holes on the underside to join the boards. Attach the completed tabletop to the A-frame base by driving 2 ½” screws up through the top cross supports.
3. Construct the Planter Box (Crucial Step)
If you skip proper drainage, sitting water will rot your table from the inside out within a year.
- The Box: Build a simple rectangle out of the 1×6 boards to fit snugly inside the tabletop void. Fasten it to the underside of the table using pocket screws.
- Waterproofing: Line the inside of the box with a heavy-duty plastic liner. Staple it securely near the top edge.
- Drainage: Drill multiple small holes directly through the plastic liner and the wooden bottom of the box. This allows excess water from the soil to drip straight down onto the ground. Add a layer of landscape fabric over the holes so the dirt doesn’t wash out.
4. Sanding and Weatherproofing
Outdoor furniture takes a beating from UV rays and rain. Proper sealing is non-negotiable.
- Smooth it Out: Sand the entire piece, stepping up from 80-grit to 220-grit. Wipe away all dust with mineral spirits.
- Sealant: Apply at least three coats of exterior spar urethane. Unlike standard polyurethane, spar urethane flexes with the wood as temperatures change, preventing the finish from cracking and peeling. Coat the end-grain heavily, as it absorbs the most moisture.
The Best Plants for a Table Garden
Because the planter is shallow (around 5 inches deep), you need plants with compact root systems.
- Low Maintenance: Succulents and cacti are perfect for tables in direct, full sun. They barely need water, which protects the wood even further.
- Culinary Herbs: Basil, rosemary, thyme, and oregano thrive in shallow soil. Keep mint in its own small plastic pot inside the trough; otherwise, its aggressive roots will choke out everything else.
- Modern Zen: Skip the dirt entirely. Fill the trough with smooth river rocks, decorative glass, or faux moss for a sleek, zero-upkeep look.
Building your own DIY patio furniture saves money and results in a much higher quality piece. Take your time on the joinery and weatherproofing, and this A-frame table will host backyard dinners for years to come.