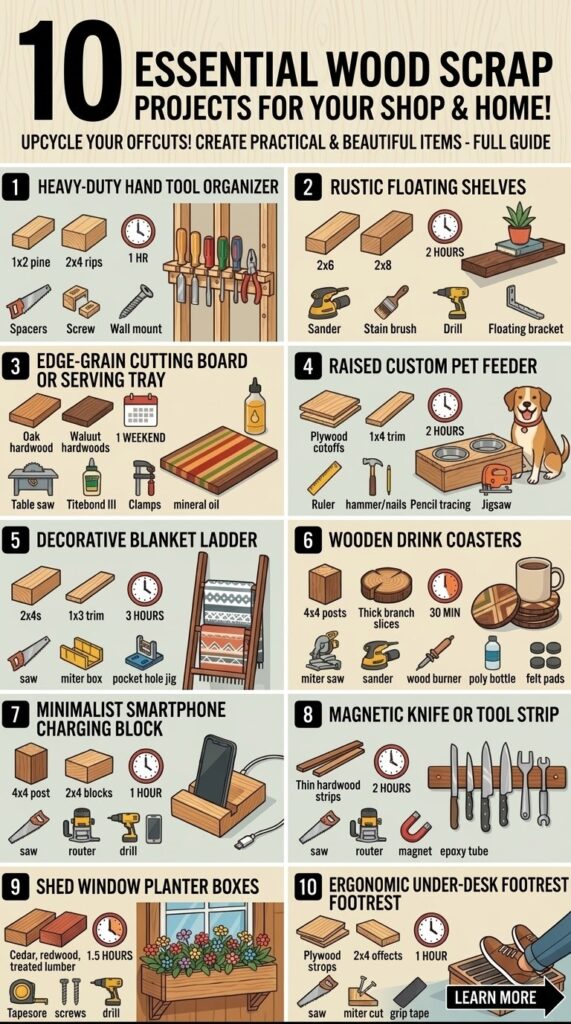
If you have just finished building a wood project, congratulations. You likely have a beautiful new storage space, a great sense of accomplishment, and a massive pile of leftover 2x4s, plywood cutoffs, and trim pieces sitting in the middle of your yard.
Tossing those offcuts into the dumpster is essentially throwing away money. Lumber is expensive, and even the smallest cutoffs have serious DIY potential. Instead of sending good wood to the landfill, you can use those leftovers to build functional, high-quality items for your home, your garden, or your newly built shed.
Whether you are a beginner looking for miter saw practice or an experienced DIYer trying to maximize your lumber budget, here are 10 easy, useful, and creative things to make with scrap wood this weekend.
Why You Should Never Throw Away Scrap Wood
Before we get to the projects, it is important to understand why keeping a well-organized scrap pile is a core habit of experienced builders:



- Cost Efficiency: Wood is pricey. Repurposing a $15 sheet of leftover plywood into a functional shelf saves you from buying new materials later.
- Skill Building: Small projects are the best way to practice new woodworking techniques. You can test out a new router bit, experiment with wood stain, or practice complex joinery on scrap wood without the fear of ruining an expensive board.
- Quick Fixes: Having spare 2×4 blocks or plywood strips on hand is invaluable when you need to quickly shim a workbench, create a temporary jig, or patch a hole.
Now, grab your tape measure, fire up your saws, and let’s put that leftover shed lumber to work.
1. Heavy-Duty Hand Tool Organizer
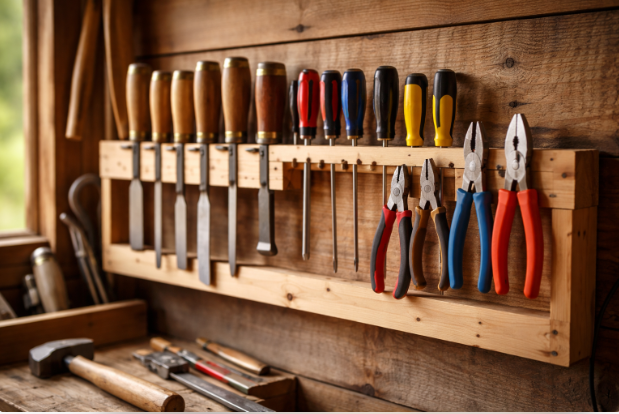
Long, skinny cutoffs are practically useless for structural framing, but they are perfect for organizing your new shed or workshop. A custom drop-in rack keeps your chisels, screwdrivers, pliers, and wrenches off your workbench and within arm’s reach.
🚧 Planning Your Next Build?
Don't start without the Ultimate Guide: Barns, Sheds & Outbuildings. It’s the "DIY Bible" containing:
- 100+ Plans: Barns, sheds, garages, and playhouses.
- Step-by-Step: Covers foundations, framing, wiring, and roofing.
- Blueprints: Includes info on ordering CAD files.
- Best Scrap to Use: 1×2 pine, 2×4 rips, or thin plywood strips.
- Estimated Time: 1 Hour
- How to Build It: Cut two identical lengths of scrap wood to serve as the front and back of the rack. Cut several small, 1/2-inch wooden spacers.
- Sandwich the spacers between the front and back pieces, leaving gaps perfectly sized for your tool handles.
- Before screwing the assembly together, use a set of one-handed mini bar clamps like the IRWIN QUICK-GRIP Clamps to tightly sandwich the wooden spacers and outer boards while the wood glue sets. Holding the pieces together by hand will inevitably cause the spacers to slip out of alignment, resulting in uneven slots that won’t hold your tools securely, so a firm, hands-free clamp is, I would say arecommended requirement.
2. Rustic Floating Shelves
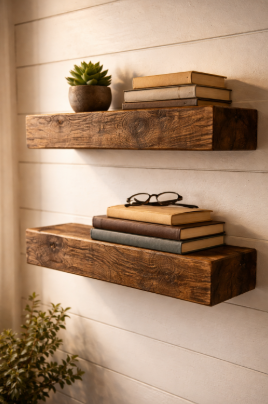
Floating shelves are incredibly popular in modern farmhouse interior design, and they are shockingly expensive to buy at retail stores. You can build them for free using the thicker offcuts from your shed’s floor joists or roof rafters.
- Best Scrap to Use: 2×6, 2×8, or 2×10 lumber.
- Estimated Time: 2 Hours
- How to Build It: Sand the boards thoroughly, starting with 80-grit sandpaper and working your way up to 220-grit for a smooth finish.
- Apply a dark walnut or weathered gray wood stain, followed by a coat of matte polyurethane.
- To make them “float,” drill deep holes into the back edge of the board and slide them onto solid steel, heavy-duty concealed floating shelf brackets, (like this 6-inch industrial set from Starunder) mounted to your wall studs.
- Standard hardware will slowly bend under the immense weight of thick 2×6 or 2×8 lumber, so upgrading to solid steel ensures your shelves stay perfectly level and securely anchored without ruining the rustic aesthetic.
Woodworkers’ Paradise
220 Comprehensive DIY Woodworking Plans & Home Projects
Step-by-step guides, detailed cut lists, and clear diagrams for all skill levels. Build furniture, outdoor sheds, toys, and more!
3. Edge-Grain Cutting Board or Serving Tray

If your shed build or any other wood project included any hardwood trim (like oak, maple, or walnut), do not burn the scraps. Small chunks of hardwood can be laminated together to create stunning, high-end cutting boards or charcuterie trays.


- Best Scrap to Use: Hardwood only (avoid pine or treated lumber for food surfaces).
- Estimated Time: 1 Weekend (requires overnight drying).
- How to Build It: Rip your hardwood scraps into uniform strips on a table saw. Turn them so the edge grain faces up.
- Apply a generous bead of an ultimate waterproof, FDA-approved wood glue—like Titebond III Ultimate Tan Wood Glue 16 oz.—along the edge grain and clamp them tightly together overnight. Since the cutting board will be washed repeatedly, using a glue with superior waterproof bond prevents the laminated strips from separating and keeps bacteria out of the joints.
4. Raised Custom Pet Feeder

Give your dog or cat a more comfortable dining experience by building a custom raised bowl stand. Elevating food and water bowls can help improve a pet’s digestion and reduce strain on their neck and joints.
- Best Scrap to Use: Plywood cutoffs or 1×4 trim pieces.
- Estimated Time: 2 Hours
- How to Build It: Measure your pet’s ideal eating height. Build a simple rectangular box frame using wood glue and brad nails.
- For the top piece, trace the outline of your pet’s bowls. While standard cheap bowls easily dent and rust, upgrading to a premium option—like the ultra-durable, double-walled YETI Boomer 8 Stainless Steel Dog Bowl—ensures they will withstand years of heavy use without holding onto harmful bacteria. Use a jigsaw to cut out the circles, dropping the heavy bowls securely into the holes.
5. Decorative Blanket Ladder
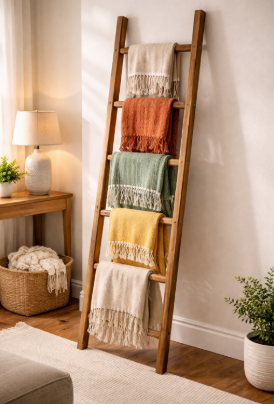
Blanket ladders are a great way to display throw blankets in a living room while saving couch space. This project requires very little wood and looks incredibly professional once stained.
- Best Scrap to Use: 2x4s ripped in half, or leftover 1×3 trim.
- Estimated Time: 3 Hours
- How to Build It: Cut two long vertical pieces (the stiles) to about 5 or 6 feet long. Cut four or five horizontal pieces (the rungs) to about 18 inches wide. Angle the cuts on the bottom of the stiles at 10 degrees so the ladder leans flat against the floor.
- Attach the rungs using a pocket hole jig system from the back so the hardware is completely hidden. If you want a professional, seamless finish, upgrading to a premium system like the Kreg 720PRO Pocket-Hole Jig is a game-changer. It features automatic material thickness adjustment and includes foldable support wings, which are absolutely essential for keeping long ladder pieces perfectly stable while you drill.
6. Wooden Drink Coasters
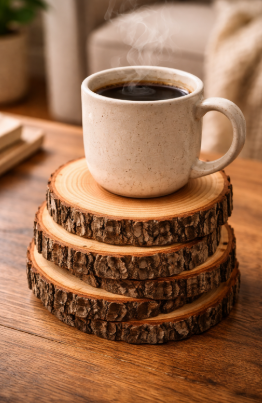
Making a set of wooden coasters is the perfect micro-project. It requires only the smallest scraps and makes a fantastic, personalized, handmade gift.
- Best Scrap to Use: 4×4 posts, thick branch slices, or patterned plywood.
- Estimated Time: 30 Minutes (plus drying time).
- How to Build It: Set your miter saw to cut thin, 1/2-inch slices off the end of a 4×4 post or a thick tree branch. Sand both sides completely smooth.
- You can leave them natural, or elevate the project into a highly personalized gift by burning custom names, logos, or geometric designs into the surface. If you want a reliable hot tool that won’t dangerously overheat in your hand, a made-in-the-USA option like the Walnut Hollow Creative Woodburner Kit is an inexpensive, beginner-friendly setup that comes with multiple interchangeable tips for different line weights.
Ready for your next project? Download the Woodworkers’ Paradise bundle. It includes 220 step-by-step plans for furniture, toys, and sheds.
Grab the complete bundle for just $4.39 (Over 50% Off) →7. Minimalist Smartphone Charging Block

Transform a single, chunky block of leftover wood into a sleek, minimalist charging station for your desk or bedside table.
- Best Scrap to Use: 4×4 post cutoffs or glued-up 2×4 blocks.
- Estimated Time: 1 Hour
- How to Build It: Cut a block of wood to about 4×4 inches. Use a router or a table saw to carve a shallow slot across the top, wide enough to cradle your phone. Drill a hole straight up through the bottom of the block so your charging cable can feed through and sit flush in the slot. Sand it smooth and apply a clear coat.
8. Magnetic Knife or Tool Strip
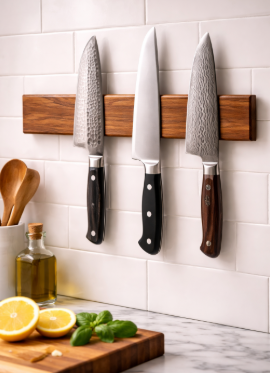
Store-bought magnetic strips are often made of cheap plastic. You can build a premium wooden version using a thin piece of scrap wood. This project is excellent for holding kitchen knives or keeping drill bits and metal hand tools organized on your shed wall.
- Best Scrap to Use: Thin hardwood strips (1/2 inch to 3/4 inch thick).
- Estimated Time: 2 Hours
- How to Build It: Cut a piece of wood to your desired length (usually 12 to 18 inches). Using a router, hollow out a deep channel along the back of the board. You want the remaining wood at the front to be very thin so the magnetic pull is strong. Glue heavy-duty neodymium magnets into the channel using two-part epoxy. Once dry, mount the strip to the wall using countersunk screws.
9. Shed Window Planter Boxes
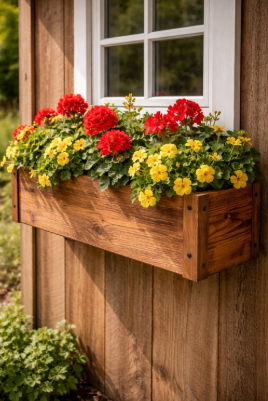
What better way to use leftover shed lumber than to upgrade the shed itself? Window planter boxes add immediate curb appeal and rustic charm to any backyard build.
- Best Scrap to Use: Cedar, redwood, or pressure-treated lumber (must be rot-resistant).
- Estimated Time: 1.5 Hours
- How to Build It: Measure the width of your shed windows. Construct a simple rectangular box using exterior-grade wood glue and galvanized deck screws to prevent rust. Drill several 1/2-inch holes in the bottom board for water drainage. Mount the boxes directly to the shed siding under the windows, fill with potting soil, and plant colorful flowers or trailing vines.
- Since these boxes will be sitting in wet soil and rain, do not use the leftover framing nails from your shed build—they will rust and leave ugly streaks on your siding. Grab a small, affordable pack of Deckmate Galvanized Wood Screws. They are specifically coated to prevent corrosion, ensuring your planter boxes stay beautiful for years.
Ready for your next project? Download the Woodworkers’ Paradise bundle. It includes 220 step-by-step plans for furniture, toys, and sheds.
Grab the complete bundle for just $4.39 (Over 50% Off) →10. Ergonomic Under-Desk Footrest
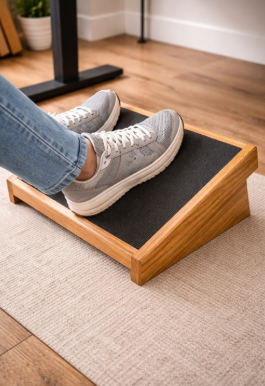
If you spend hours sitting at a desk planning your next DIY build, an ergonomic footrest can dramatically improve your posture and reduce lower back pain.
- Best Scrap to Use: Plywood scraps and 2×4 offcuts.
- Estimated Time: 1 Hour
- How to Build It: Cut a rectangular piece of 1/2-inch or 3/4-inch plywood to roughly 18×12 inches. Cut two pieces of 2×4 to serve as the side supports. Miter the top edge of the 2x4s at a 15-to-20-degree angle. Lay the plywood across the angled supports and secure it with wood glue and brad nails. Add a strip of grip tape to the top surface to keep your feet from sliding.
- A wooden footrest is great for your posture, but bare plywood can be slippery under your shoes. Adding a strip of heavy-duty anti-slip grip tape to the angled surface is a tiny, under-$10 investment that makes the footrest actually functional and safe to use all day.
Pro Tip: How to Store Your Scrap Wood
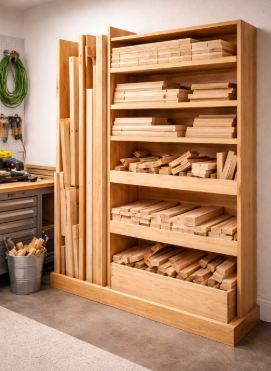
If you still have wood leftover after these projects, do not leave it sitting in the grass. Ground moisture will warp and rot the wood within weeks.
To keep your scrap lumber usable for future projects, build a simple storage rack inside your new shed. Store sheet goods (like plywood and OSB) standing vertically against a wall. Store dimensional lumber (like 2x4s and 2x6s) horizontally on wall brackets to keep them perfectly straight.
Woodworkers’ Paradise
220 Comprehensive DIY Woodworking Plans & Home Projects
Step-by-step guides, detailed cut lists, and clear diagrams for all skill levels. Build furniture, outdoor sheds, toys, and more!
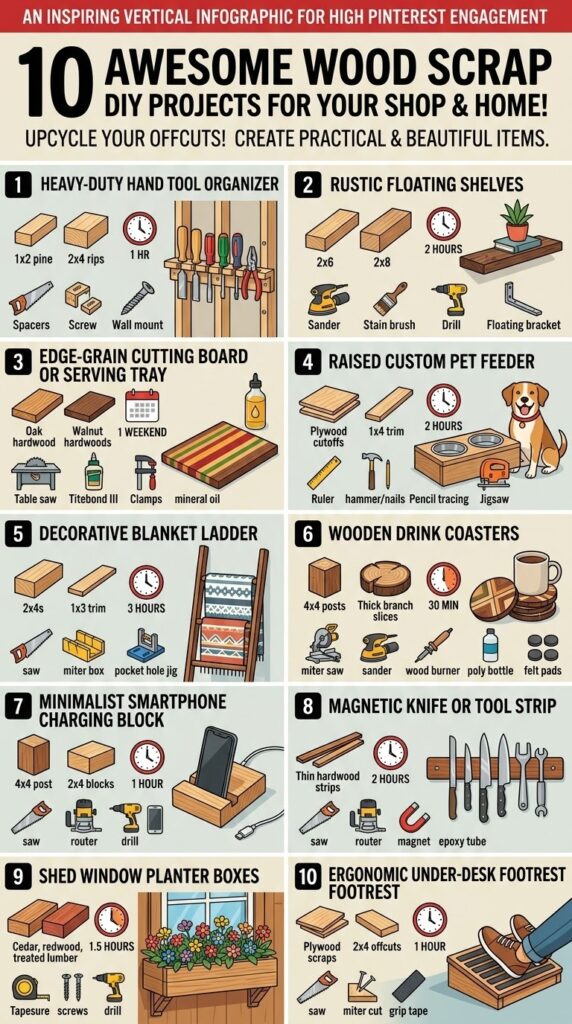
Sharing is Caring PIN This Post: