
7 Wood Filler Mistakes Ruining Your DIY Projects (And How to Fix Them)
Whether you are restoring a vintage dresser, installing baseboards, or fixing a gouge in your hardwood floor, wood filler is an indispensable tool in the DIYer’s kit. It is designed to be the “magic eraser” of woodworking, hiding knots, nail holes, and accidental dings. However, wood filler is also one of the most misused products in home improvement.
When applied incorrectly, wood filler can crack, fall out, or create a glaringly obvious patch that refuses to take stain. If you’ve ever wondered, “Why does my wood filler crack?” or “Why is my patch a different color than the rest of the wood?”, you aren’t alone.
To help you achieve professional results, we’ve identified the seven most common wood filler mistakes and provided detailed solutions for how to fix them.
1. Using the Wrong Type of Filler for the Environment

One of the most frequent wood filler mistakes is treating all products as if they are interchangeable. There are two primary categories of wood filler: water-based and solvent-based.



Water-based fillers are easy to clean up and have low odors, making them great for interior furniture. Solvent-based fillers are more chemically robust and resist the elements better but require mineral spirits for cleanup. Using an interior-only filler on an outdoor deck will result in the filler softening and washing away during the first rainstorm.
How to Fix It
Always match the product to the location. If you are working on a project that will be exposed to moisture or temperature fluctuations, look for the best exterior wood filler for deep holes. These are often two-part epoxy fillers or high-performance wood hardeners that bond chemically with the wood fibers. For indoor furniture that needs a fine finish, a high-quality water-based filler is usually the better choice for ease of use.
🚧 Planning Your Next Build?
Don't start without the Ultimate Guide: Barns, Sheds & Outbuildings. It’s the "DIY Bible" containing:
- 100+ Plans: Barns, sheds, garages, and playhouses.
- Step-by-Step: Covers foundations, framing, wiring, and roofing.
- Blueprints: Includes info on ordering CAD files.
2. Neglecting Surface Preparation
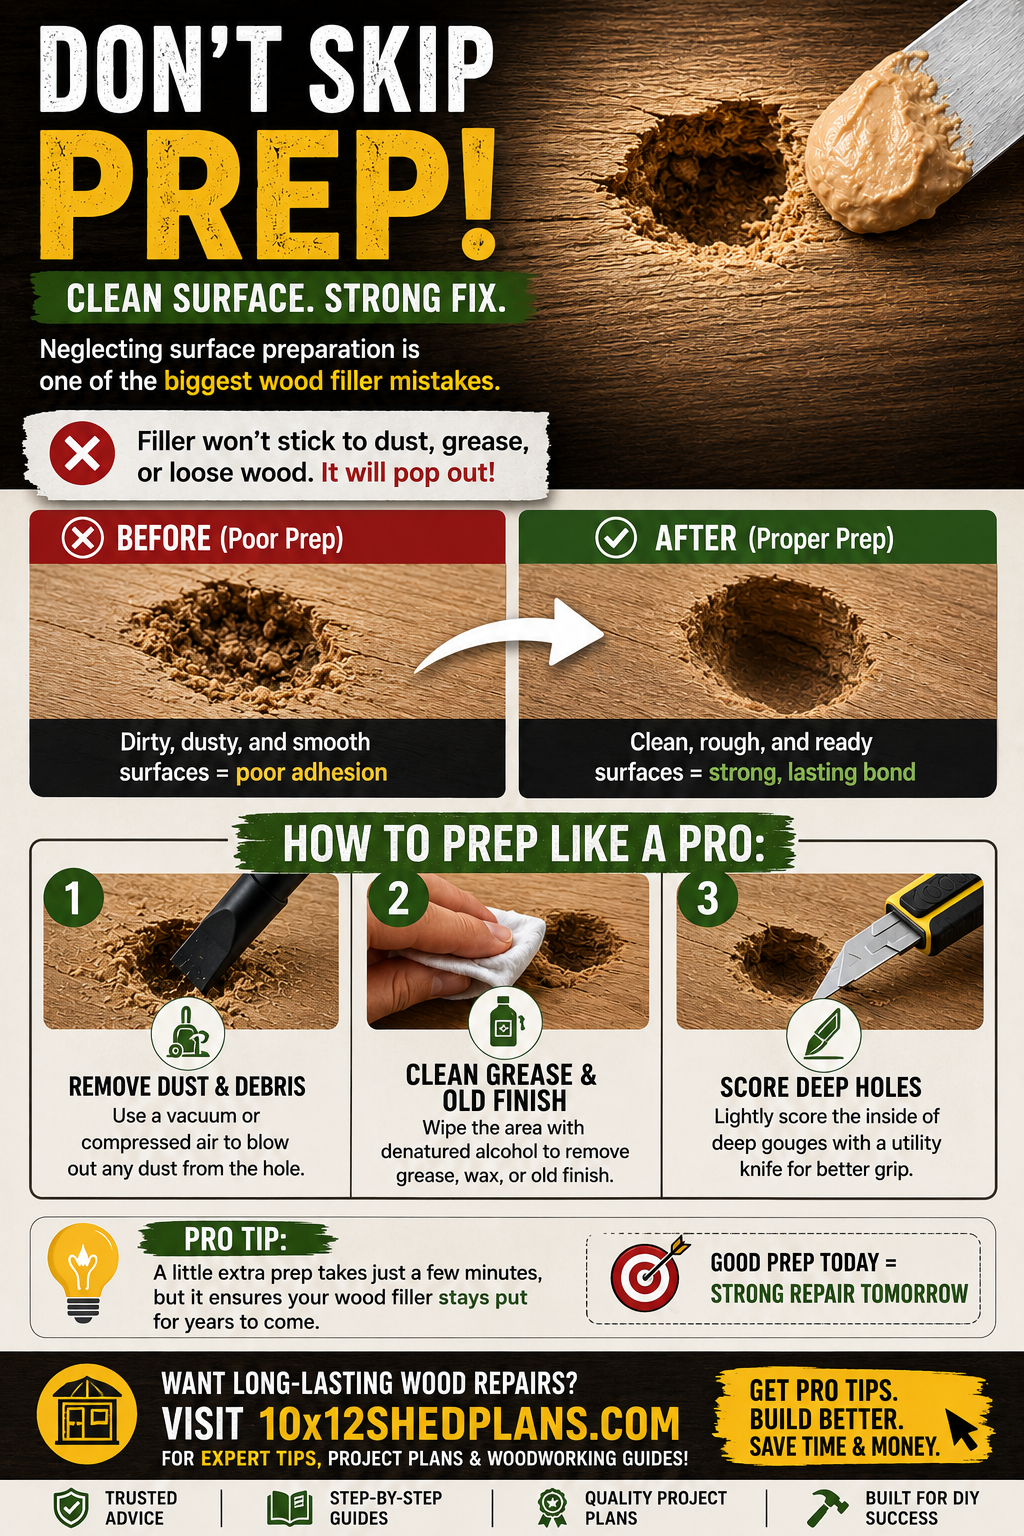
Many DIYers assume they can simply smear filler into a hole and call it a day. However, wood filler requires a clean, “toothy” surface to adhere correctly. If the hole contains sawdust, old furniture wax, or loose wood splinters, the filler will bond to the debris rather than the wood itself. This eventually leads to the patch popping out.
How to Fix It
Before learning how to apply wood filler like a pro, you must learn how to clean.
- Use a vacuum or compressed air to blow out any dust from the hole.
- If the area is greasy or has an old finish, wipe it down with a bit of denatured alcohol.
- For deep gouges, use a utility knife to lightly score the inside of the hole; this gives the filler more surface area to “grip.”
3. Applying One Thick Layer in Deep Holes
If you are filling a deep cavity—such as a rot spot on a window sill or a large knot in a plank—applying the filler in one thick “plug” is a recipe for disaster. This leads to the common question: “Why does my wood filler crack?”
As the moisture or solvent evaporates from the filler, the material shrinks. If the mass is too thick, the outside dries faster than the inside, creating internal tension that results in deep cracks and poor adhesion.


How to Fix It
The secret to how to fix shrinking wood filler is the layering technique. Fill deep holes in 1/4-inch increments. Apply the first layer, let it dry completely (usually 2 to 4 hours depending on the product), and then apply the next layer. This ensures that each layer is stable before the next one is added, significantly reducing the risk of shrinkage and structural failure.
4. Using the Wrong Tools for Application
Many people use their fingers or a stiff, rusty putty knife to apply wood filler. Using your finger introduces oils from your skin into the filler, which can affect the drying process and the way the patch accepts stain. Using a stiff knife can gouge the surrounding wood, creating more work for you during the sanding phase.
How to Fix It
Invest in a high-quality, flexible putty knife for wood repair. A flexible blade allows you to “spring” the filler into the hole, ensuring it is packed tightly. The flexibility also allows you to scrape the excess filler flush with the surface in one smooth motion, which minimizes the amount of sanding required later. A 1-inch or 2-inch stainless steel flexible knife is the gold standard for most home DIY projects.
5. Falling for the “Stainable” Marketing Trap
Almost every container of wood filler claims to be the best stainable wood filler. In reality, wood filler is a composite material (usually wood flour mixed with a binder), and it will never absorb stain exactly like natural wood grain. If you apply a dark stain over a “stainable” filler, the patch often ends up looking like a solid, muddy spot or a bright, unabsorbed highlight.
How to Fix It
Never trust the label without a test. Take a scrap piece of the same wood species you are repairing, apply the filler, and let it dry. Then, apply your chosen stain to see how it reacts.
- Pro Tip: If the filler isn’t taking stain well, you can mix a small amount of the actual wood stain into the filler before applying it. Alternatively, use wood-tone repair markers or “burn-in” sticks after the project is finished to draw in faux grain lines, helping the patch blend seamlessly.
6. Sanding Too Soon (or Too Aggressively)
Patience is the most difficult part of any DIY project. If you sand wood filler before it is 100% cured, the center of the patch may still be soft. The sandpaper will “gum up,” and you might pull the filler right out of the hole. Conversely, if you sand too aggressively with a low-grit paper, you can create a depression (or “dish”) in the wood around the patch.
How to Fix It
Check the manufacturer’s dry time, then add an hour for good measure. When you are ready to sand, start with a medium-grit paper (120-grit) to level the filler, and finish with a fine-grit (220-grit) to smooth it. Always use a sanding block rather than your bare hand. A sanding block ensures the pressure is distributed evenly, keeping the patch perfectly flat and flush with the surrounding wood.
7. Overfilling Without Considering “The Mound”
While we mentioned that underfilling is a problem, overfilling is equally common. Some DIYers leave a massive, mountain-like heap of filler over a tiny nail hole. This results in an enormous amount of unnecessary sanding, which creates fine dust that gets everywhere and increases the risk of scuffing the surrounding wood finish.
How to Fix It
When applying filler, you want to leave a very slight “mound”—just enough to account for the natural shrinkage that happens as it dries. Use your flexible putty knife for wood repair to scrape the filler almost flush, leaving it just a hair (about 1/32 of an inch) above the surface. This “mound” ensures that once the filler shrinks and is sanded down, the result is a perfectly level surface.
Quick Reference: Which Filler Should You Use?
| Project Type | Recommended Filler Type | Key Feature |
|---|---|---|
| Interior Furniture | Water-based Wood Filler | Easy to sand, low odor |
| Exterior Decks/Siding | Two-Part Chemical Wood Filler | Won’t shrink or rot |
| Hardwood Floor Gaps | Trowelable Wood Filler | Thin consistency for large areas |
| Stained Cabinetry | Pre-tinted Putty | Matches specific wood species |
Conclusion
Perfect wood repairs aren’t about being a master carpenter; they are about understanding the limitations of your materials. By selecting the right product—whether that’s finding the best stainable wood filler for a table or the best exterior wood filler for deep holes for a porch—you set yourself up for success from the start.
Remember to prep your surface, use a flexible putty knife, and account for the natural shrinkage of the material. If you take the time to layer your filler and sand it only once it’s fully cured, you can eliminate the cracks and unsightly patches that ruin DIY projects. With these seven fixes in your repertoire, your next repair will be so seamless that only you will know it’s there.