
If there is one thing I’ve learned after spending countless hours covered in sawdust, it’s that having the right tool for the job isn’t just a luxury—it’s the difference between a masterpiece and firewood. When I first started out, I thought a standard set of drill bits was all I needed to build furniture. I quickly learned that forcing a twist bit to do a Forstner bit’s job only leads to tear-out, frustration, and ruined lumber.
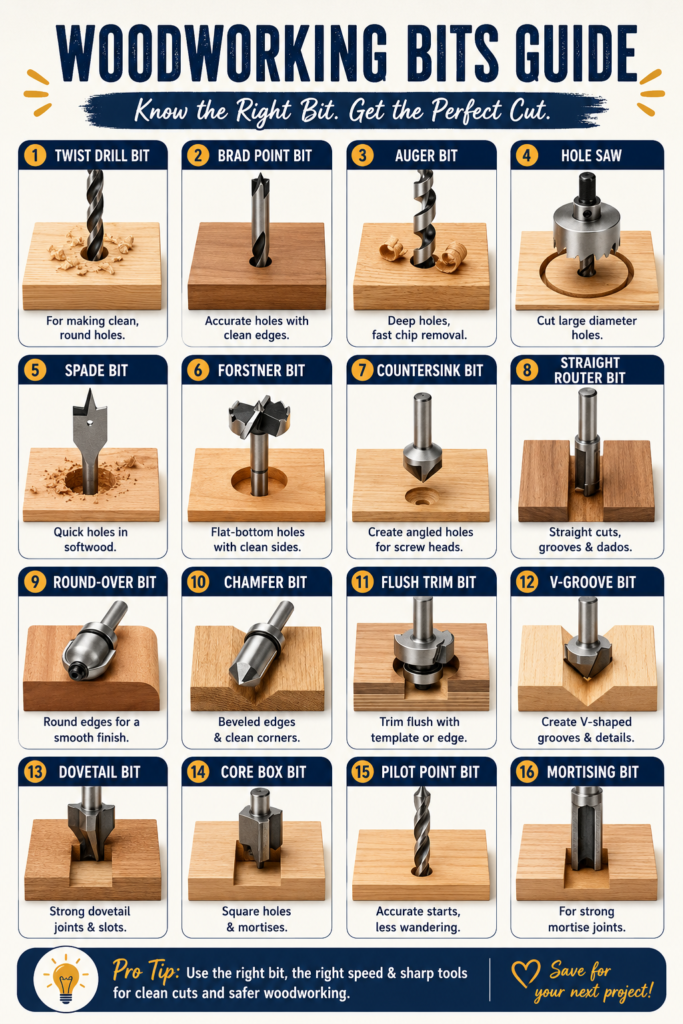
Whether you are setting up your first garage shop or looking to upgrade your professional toolkit, understanding the specific profiles and purposes of different drill and router bits is essential. Today, I am going to walk you through twelve indispensable bits I use in my workshop, categorizing them by their specific applications so you know exactly what to reach for on your next project.
The Complete Drill & Route Workshop Upgrade
To help you achieve the clean, burn-free cuts mentioned in this guide, I’ve put together this specialized bit bundle. These tools give you better control and a smoother finish on all your woodworking projects
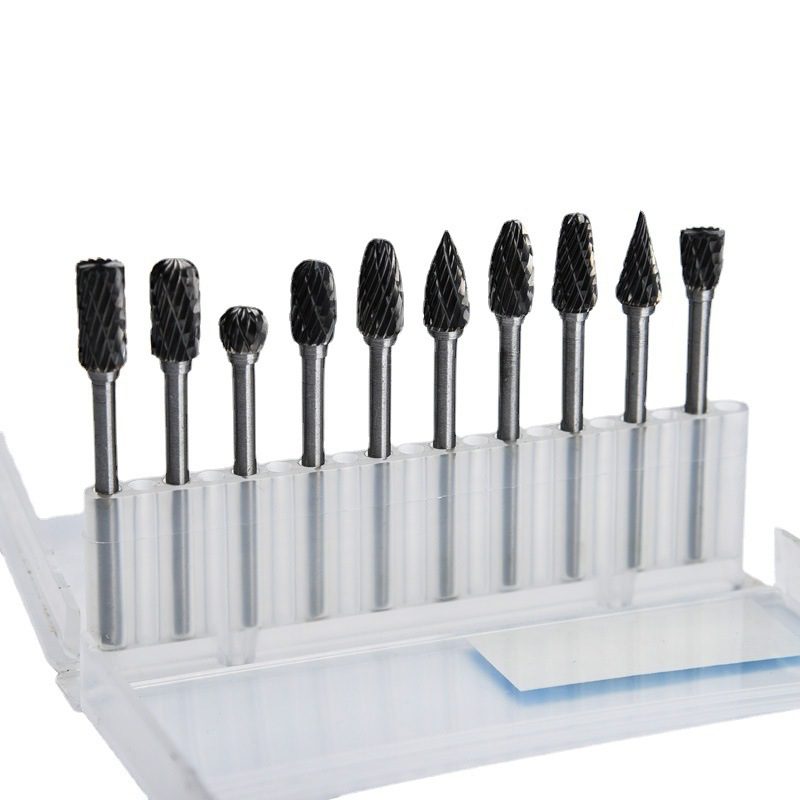
Wood Carbide Rotating Router Bits Set
Achieve flawless edge profiles, flush trims, and intricate joinery. This 10-piece set cuts through hardwoods without the tear-out or burning.
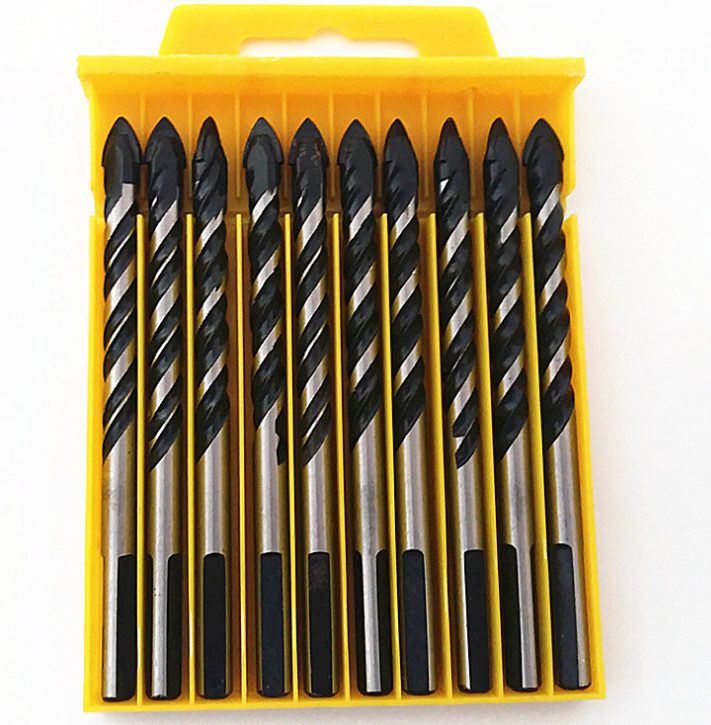
Triangular-overlord Multifunctional Drill Bits
Eliminate bit wandering. The unique triangular handle provides unmatched chuck stability and pinpoint accuracy across multiple materials.
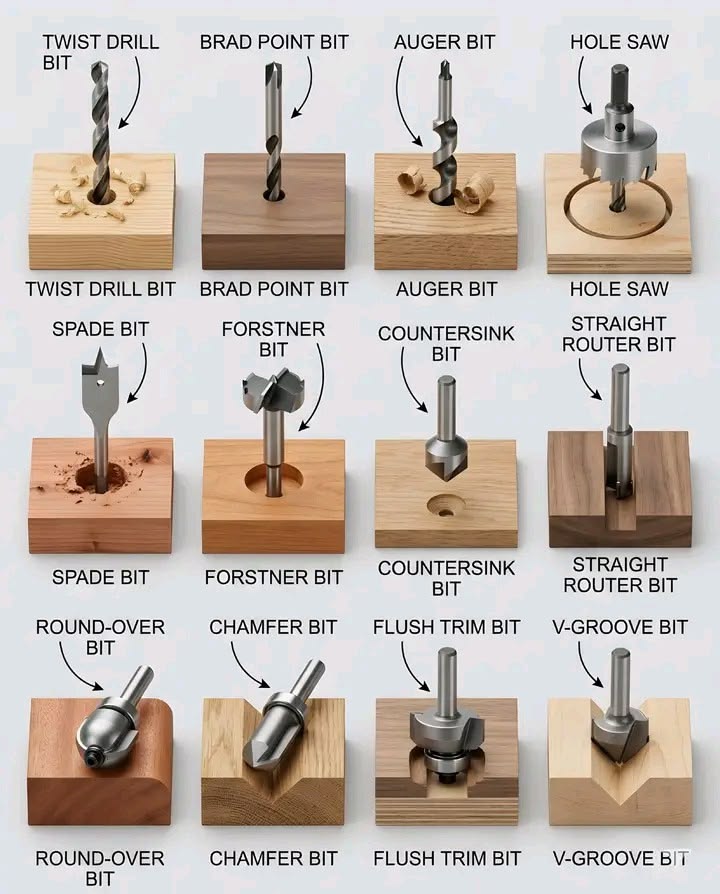
Part 1: The Drilling Essentials
When you just need to make a hole, these are your go-to options. But as you’ll see, not all holes are created equal.
Twist Drill Bit
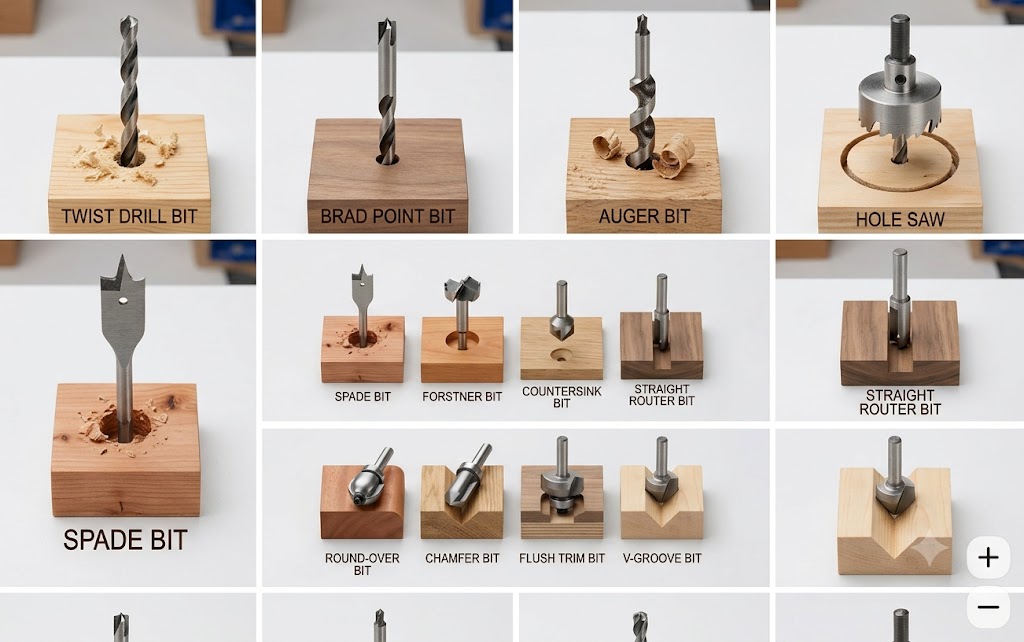
The twist drill bit is the undisputed workhorse of any toolbox. I have dozens of these scattered around my shop. They are designed for general-purpose drilling through wood, plastic, and metal.

While they are incredibly versatile, I find they tend to “wander” on the surface of hard woods before biting in. If I am using a twist bit on a finished piece of oak or walnut, I always use an awl to punch a small starter divot to keep the bit perfectly aligned.
Brad Point Bit
If I am doing fine woodworking, the brad point bit is what’s in my drill press. Look closely at its tip: it has a sharp central point (the brad) flanked by two cutting spurs.
🚧 Planning Your Next Build?
Don't start without the Ultimate Guide: Barns, Sheds & Outbuildings. It’s the "DIY Bible" containing:
- 100+ Plans: Barns, sheds, garages, and playhouses.
- Step-by-Step: Covers foundations, framing, wiring, and roofing.
- Blueprints: Includes info on ordering CAD files.

Why I love it: That center point bites into the wood instantly, completely eliminating the wandering issue you get with twist bits. The outer spurs slice the wood fibers at the edge of the hole before the center material is removed, leaving a remarkably clean entry hole. It’s an absolute must for dowel joinery
Auger Bit
When I need to bore a deep hole—like running wiring through wall studs or building a thick workbench top—the auger bit is my weapon of choice. It features a threaded screw tip that actually pulls the bit through the wood.
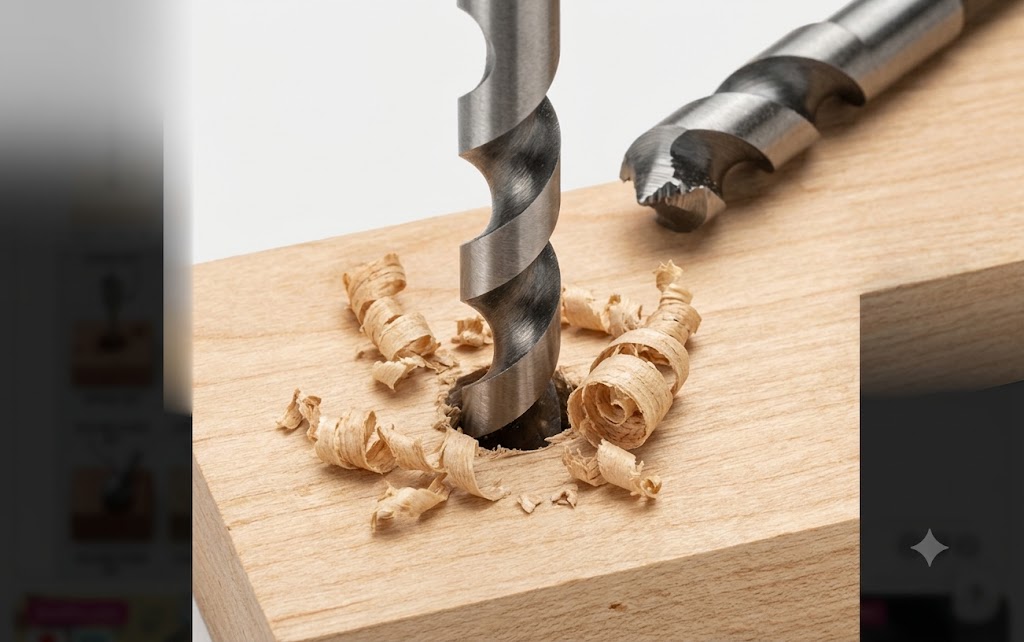
The Workshop Reality: You don’t have to push hard with an auger; the bit does the heavy lifting. The deep, wide flutes are incredible at clearing out massive amounts of wood chips, preventing the bit from binding deep inside the timber. Just hold your drill tight; the torque can be surprising!
Part 2: Boring Large Holes
Sometimes you need a hole larger than a standard drill chuck can handle. Here is how I tackle those situations.


Hole Saw
A hole saw is exactly what it sounds like: a steel cylinder with saw teeth on the rim, guided by a central pilot bit. I pull this out when I need to make large cutouts, like routing cables through a desk or installing a lockset on a door.
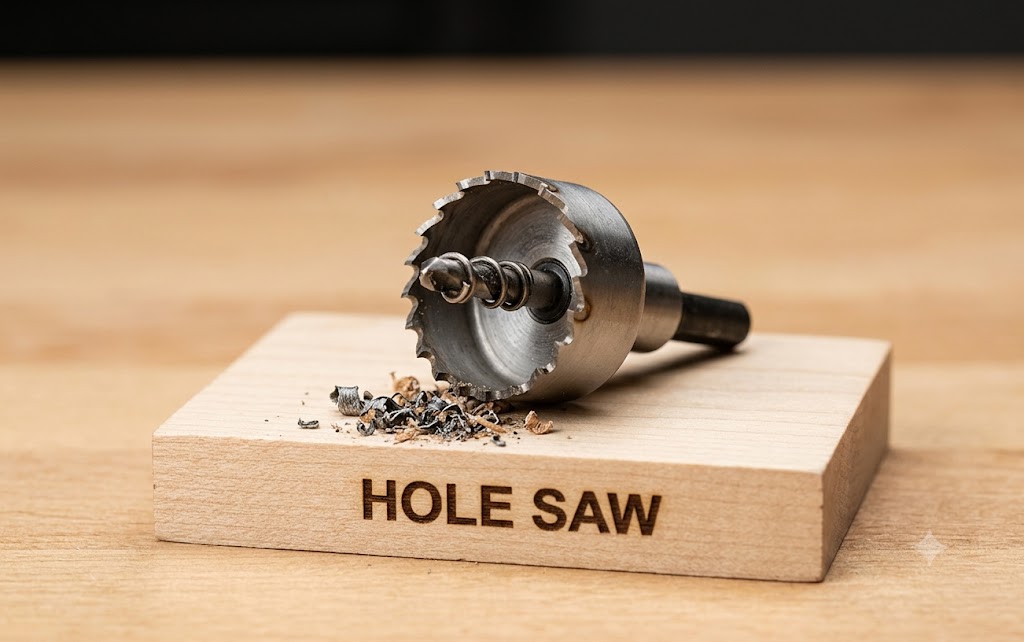
- Pro Tip: I learned the hard way that hole saws love to cause massive splintering when they exit the back of the wood. To prevent this, I drill until the pilot bit pokes through the back, then I flip the board over and finish the cut from the other side.
Spade Bit
Also known as a paddle bit, the spade bit is flat with a centering point. It is designed for rough, fast drilling.
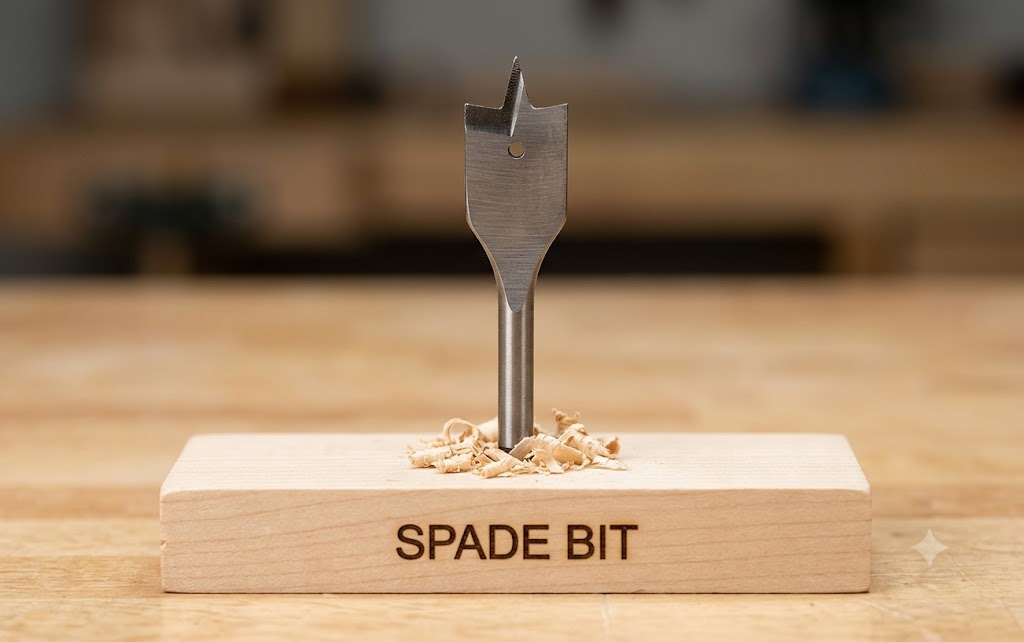
- My Experience: Let’s be honest—spade bits are not for fine furniture. They are aggressive, tear through wood quickly, and leave a very rough exit hole. I primarily use them for rough carpentry or when the hole will be completely hidden. If you must use one on a nice piece of wood, clamp a scrap board tightly to the back to minimize the inevitable blowout.
Forstner Bit
If I had to pick a favorite bit in the shop, it’s the Forstner bit. It drills perfectly smooth, flat-bottomed holes.

- When to use it: I rely on Forstner bits for installing European-style cabinet hinges, counterboring to hide bolt heads, or removing the bulk of material before chiseling out a mortise. They require a bit of pressure and generate heat, so I always use them in my drill press at a lower RPM to keep them sharp and prevent burning the wood.
Part 3: Fasteners and Finishing
Countersink Bit
Nothing ruins the look of a sleek project faster than proud screw heads catching your hand. A countersink bit features a conical profile that cuts a small bevel into the rim of a pilot hole.

- The Result: This allows the head of a wood screw to sit perfectly flush with—or slightly below—the surface of the wood. For projects I plan to paint or plug, I drill the countersink a bit deeper so I can hide the fastener completely with wood filler or a dowel plug.
Part 4: Router Bits for Shaping and Joining
Moving away from the drill, router bits allow us to shape edges, carve out joinery, and duplicate parts. These are the profiles I keep permanently loaded in my router table.
Straight Router Bit
The straight bit is the foundation of router joinery. It simply cuts straight down and clears out material.
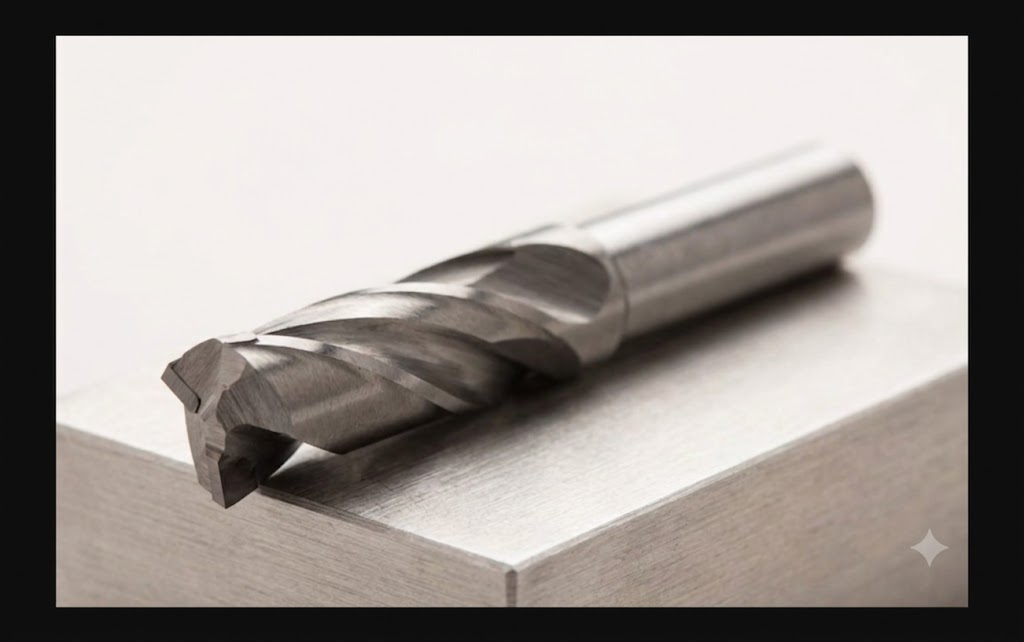
- Shop Applications: I use these constantly for cutting dadoes (trenches across the grain to hold shelves), grooves (trenches with the grain), and rabbets (recesses along the edge of a board). A good quality carbide-tipped straight bit is worth its weight in gold for building cabinets.
Stop Imagining. Start Creating.
Equip your workshop to create the intricate details and precise joinery that make your projects stand out. This combined kit provides the specialized bits you need for fine carving and pinpoint drilling—as featured in our Ultimate Guide.
Round-Over Bit
When a project is fully assembled, the edges are usually sharp and unforgiving. The round-over bit features a concave profile with a small pilot bearing at the bottom.
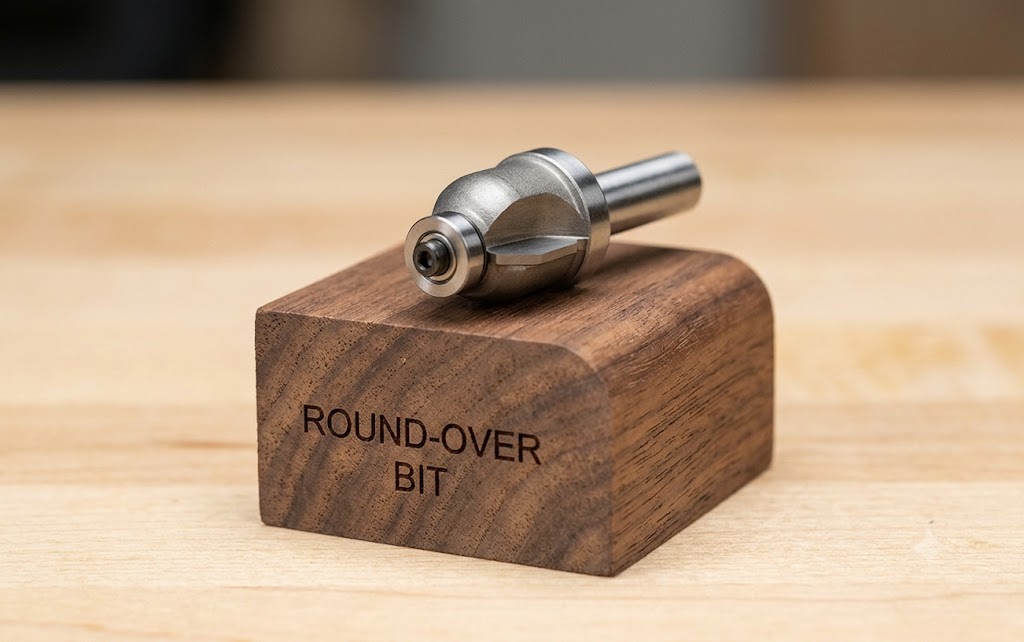
- Why it matters: Running this along the edge of a table or chair leg softens the sharp 90-degree corner into a smooth quarter-circle. It not only makes the furniture safer and more comfortable to touch, but it also makes the finish (like stain or polyurethane) adhere better, as finishes tend to pull away from sharp corners.
Chamfer Bit
Similar to the round-over, the chamfer bit eases sharp edges, but instead of a curve, it cuts a flat 45-degree bevel.
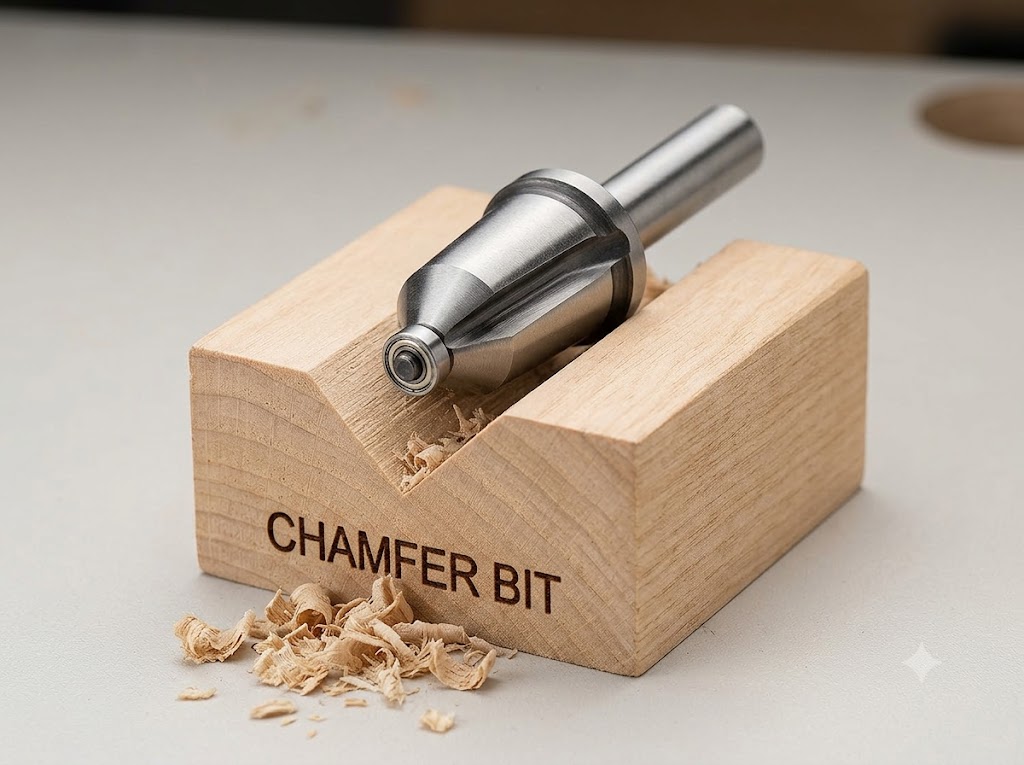
- Design Choice: I frequently use chamfer bits on modern or minimalist pieces. It gives a crisp, intentional shadow line that looks incredibly professional. I also use it on the bottoms of table legs to prevent the wood from splintering when dragged across a floor.
Flush Trim Bit
This bit is pure magic for production work or templating. It is a straight-cutting bit with a ball bearing that exactly matches the diameter of the cutting blades.
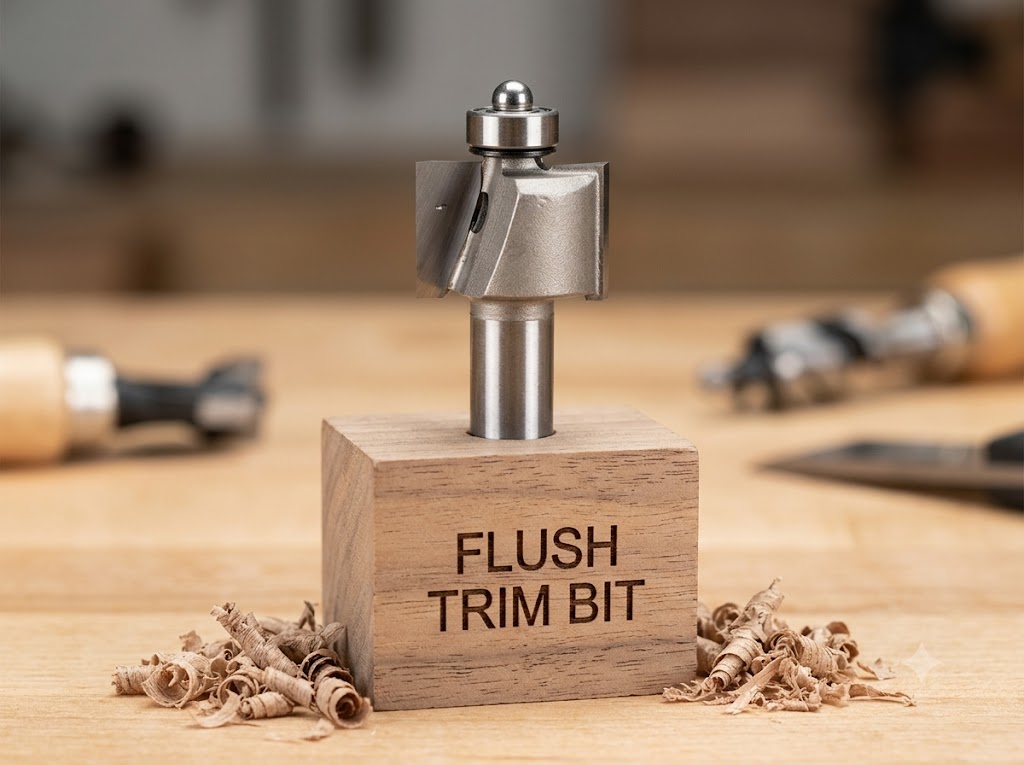
How I use it: If I want to make four identical curved chair legs, I create one perfect template out of MDF. I rough-cut my actual wood slightly oversized, attach the template on top, and run the flush trim bit along it. The bearing rides the template while the blades trim the wood underneath to perfectly match the shape.
V-Groove Bit
The V-Groove bit cuts a sharp, V-shaped trench into the face of the wood.

Creative uses: I don’t use this for structural joinery. Instead, it’s my go-to for decorative work. I use it for engraving text into wooden signs, creating decorative fluting on solid panels, or adding subtle aesthetic lines to cabinet doors.
Frequently Asked Questions
What is the difference between a twist bit and a brad point bit?
A twist bit is for general-purpose drilling across various materials, but it can slip on smooth surfaces. A brad point bit is specifically engineered for wood; it features a sharp center point that anchors the bit instantly, ensuring precise hole placement without wandering.
Can I use router bits in a standard drill?
Absolutely not. This is a major safety hazard I always warn beginners about. A drill typically maxes out around 1,500 to 2,500 RPM. Router bits are designed to cut at 10,000 to 24,000 RPM. Using a router bit in a drill will result in severe kickback, torn wood, and potential injury.
How do I prevent wood from splitting when drilling?
Splitting and “blowout” (when the back of the wood tears as the bit exits) are common frustrations. My personal method to avoid this is to clamp a piece of scrap wood tightly to the back of my workpiece. The scrap piece supports the wood fibers, allowing the drill bit to exit cleanly without tearing the grain.
Final Thoughts from the Shop
Building a collection of bits can feel overwhelming when you are staring at a massive wall of options at the hardware store. My advice? Don’t buy a massive 100-piece kit full of profiles you will never use. Start with a solid set of brad point bits, a countersink, a round-over router bit, and a straight router bit.
Learn how these tools interact with different grain directions and wood species. As your projects get more complex, you can let your needs dictate your next purchase. Stay safe, keep your bits sharp, and happy woodworking!